Tutorial
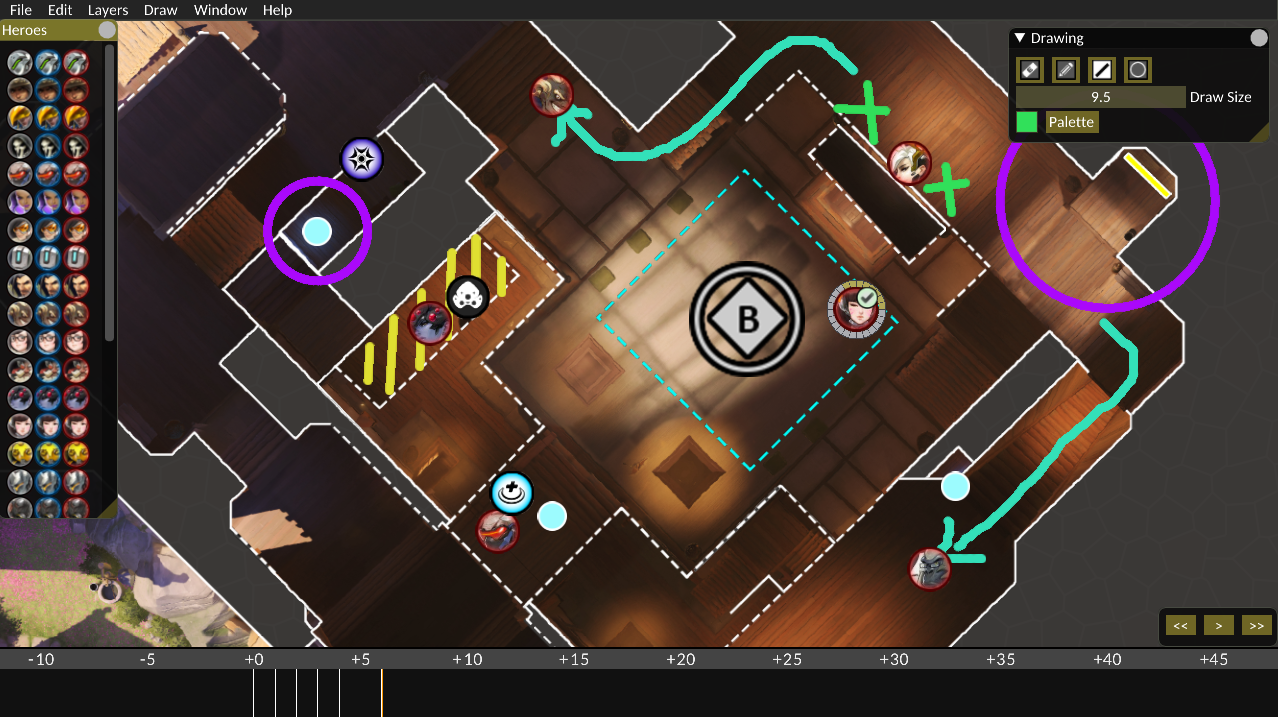
The StatBanana Planning Tool is a top-down perspective planner perfect for strategy and formation creation. Set up hero icons and control attributes such as health, ultimates, and skills. These icons can then be moved around according to a timeline to create a scripted sequence. Mark routes, select points, or draw smiley faces with the timeline-based draw and selection tools. In the future, host multi-user sessions online for remote planning.
This guide aims to go over the ins and outs of the tool, for any further support feel free to drop by our Discord Server.
The Dashboard
In order to begin a single-user session, click on the name of the map located on the left side of the dashboard. This will open a window in which to type what will be shown under the "Name" column on the right. In order to save progress in a single-user session, click File>Save before exiting the map, otherwise progress will be lost.
To begin a multi-user session, as a host of the session, click "Start Session," select the map name, and set a password. This password will be used by non-hosts to join a multi-user session.
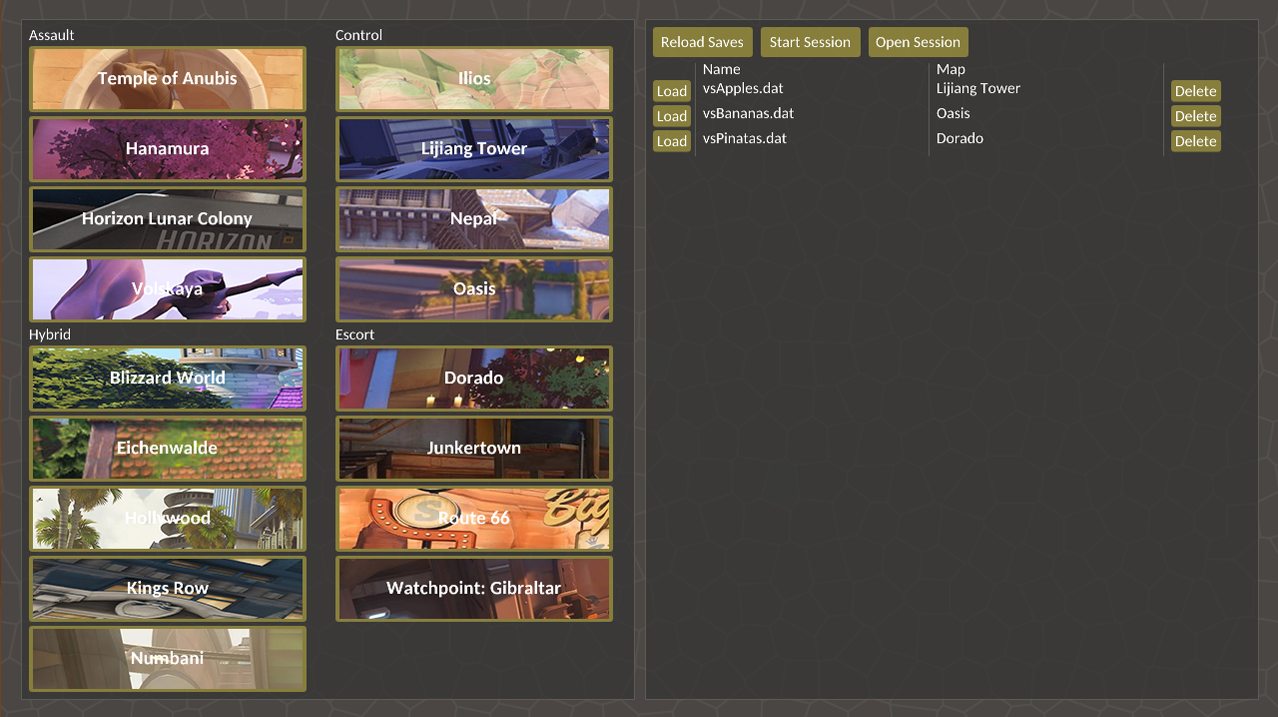
To enter a multi-user session hosted by another person, click "Open Session," type the username of the host (not case-sensitive), and enter the password designated by the host.
Hosts can save multi-user sessions as single-user maps and load them like other previous saves, but saved maps cannot be opened in another multi-user session. To host a multi-user session, a fresh map must be made. Loading previous multi-user maps are part of the features to come. More information about collaborative sessions can be found in the Collaborative Management section of the tutorial.
Deletion permanently deletes each map save with no restoration available, so use with caution.
Hero Icons
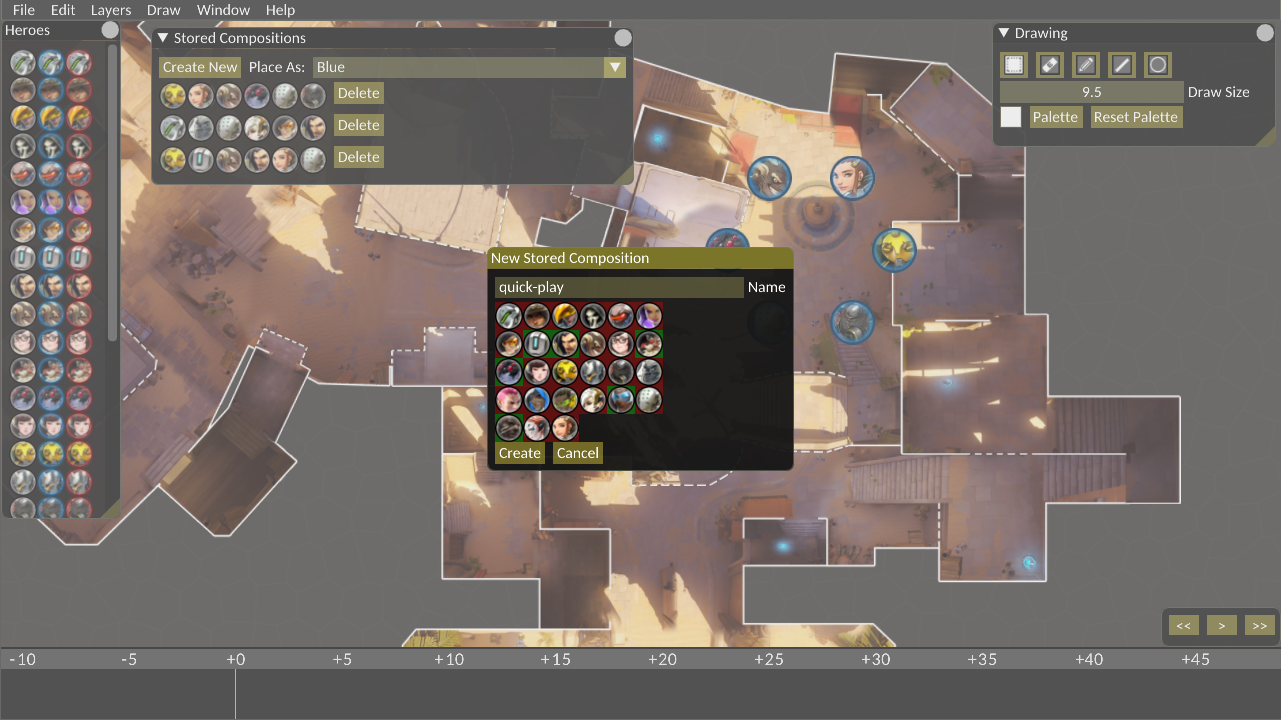
There are three icon colors of each hero that can be dragged and dropped into the map. Dragging and dropping will also re-position icons located on the map. Pre-made groups of icons can be dragged out of the "Stored Compositions" window in a default formation, which can then be repositioned individually by dragging and dropping.
Select an icon by clicking on the icon. Select multiple icons by using the box select tool located in the "Drawing" window (this tool is also activated by default). The selection will bring up a window that gives the option of adding health, ultimate, and sometimes skill options tied to each hero. These options can be changed with each keyframe, but will disappear if the hero icon is deleted from the map.

In order to delete an icon from view, hit "Delete" on the keyboard or in the menu under "Edit." This gives you the option to either delete a hero icon at the current keyframe, or to delete a hero icon at all keyframes. The hotkey "e" will hide selected hero icons at the current keyframe. "E" also hides selected skill and ultimate icons.
Create and store icon compositions of multiple heroes in the "Stored Compositions" window for easy access to common combinations in the future. To select a composition, click on the row and drag the icons out to the map. To change the color of the icons, click to the right of the "Place As:" text and set the intended color before dragging and dropping. "Create New" will make a new composition that will be permanently stored until deleted. Created compositions are shared among all saves and maps. "Delete" will permanently delete a composition. Delete will not get rid of compositions already placed on the map area, only the combination in the window.
Drawing Tools
The window containing draw tools should automatically open when a new map is loaded. It can also be opened by selecting the "Drawing" option under the "Window" option in the menu. From left to right, the draw tools are the box select, the eraser, the pencil, the line, and the circle. The draw size indicates the width of the tool, which can be adjusted for thinner or thicker marks.
Drawing works like it always does: click, hold, wobble the mouse a little, and stop the click. In order to change the color of the markings, click "Palette." In order to save a color for the map, drag and drop the selected color by clicking and holding from the bigger rectangle to the smaller collection of squares.
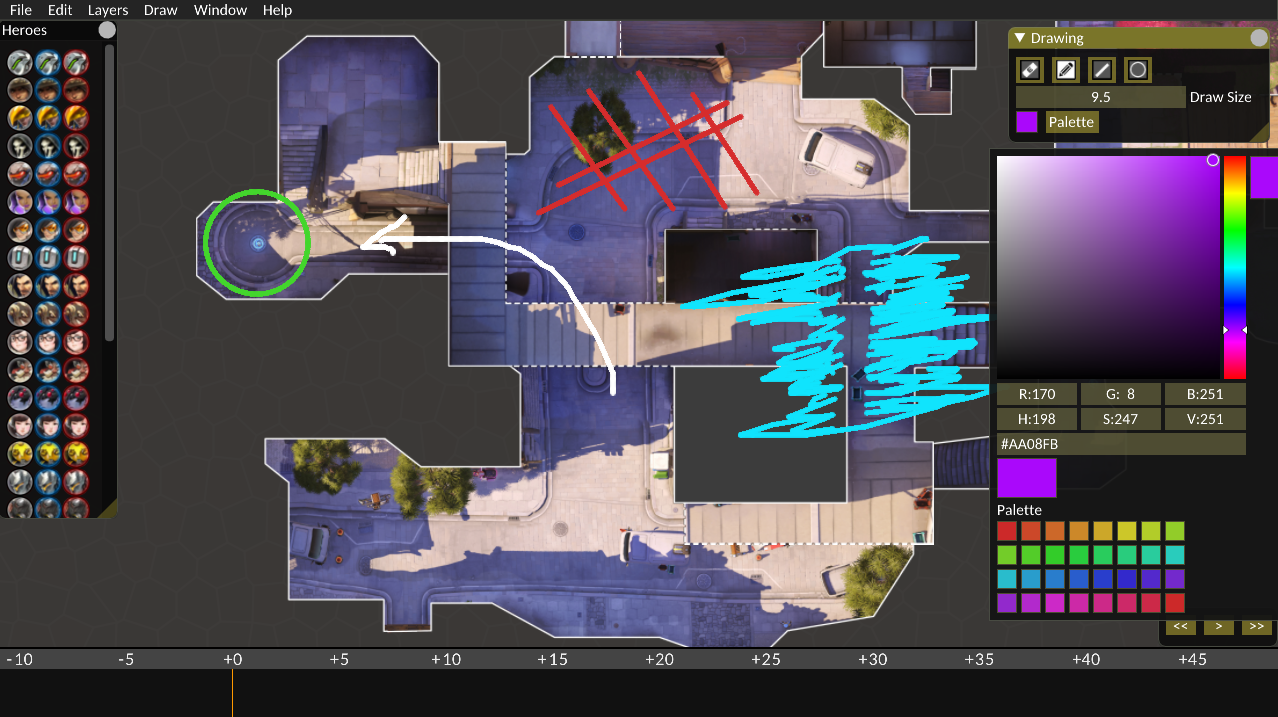
To clear the map of drawings, select the "Clear Surface" option from the "Draw" option in the menu. This full clear also occurs when the hotkey "C" is pressed. This will erase everything at the current keyframe. For spot clearing, use the eraser tool or the undo/redo options (ctrl-z/ctrl-y). To clear all draw surfaces at all keyframes, select "Clear Entire Surface" under the Draw section.
Draw tools are now dependent on the current place in the timeline. Drawing on a keyframe updates everything until the end of the timeline, but not before. Changing, redrawing, or erasing something will now update based on the timeline, like the icon movement.
Timeline Management
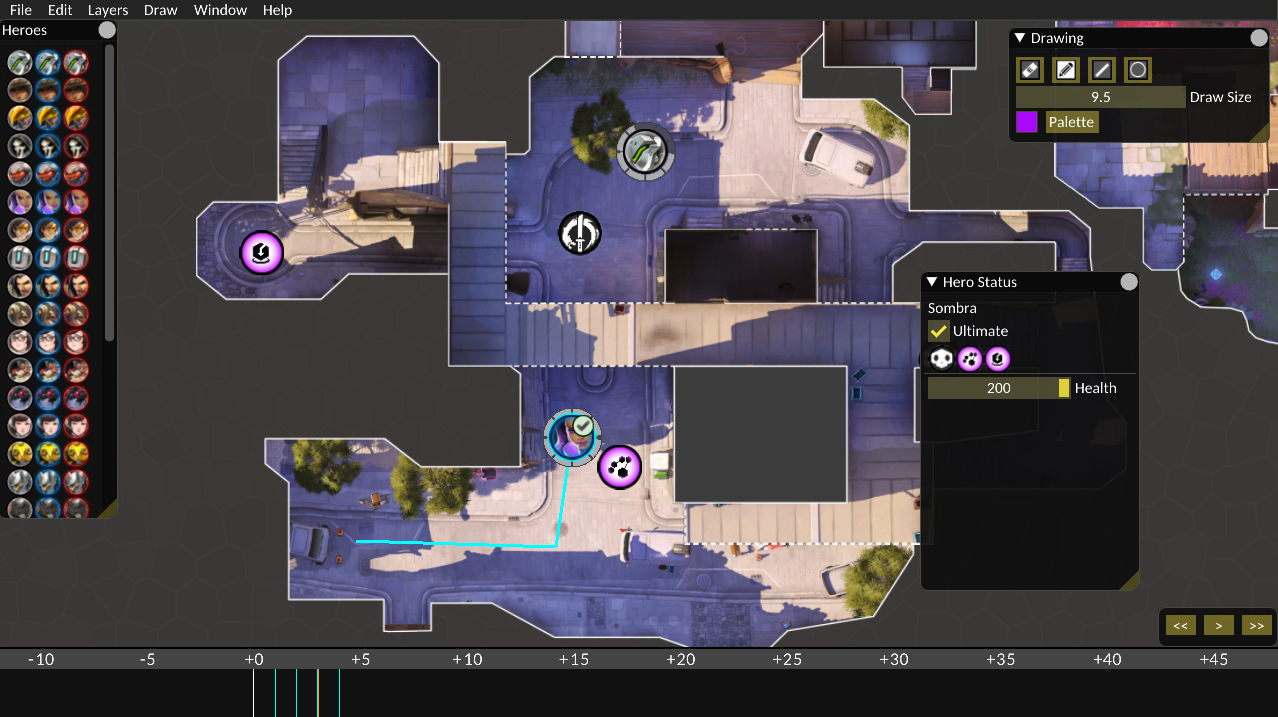
The timeline can be shown and hidden under the "Window" option in the menu. On the right of the timeline are three buttons. The passage of time can be paused and played by clicking the middle of the three. The leftmost button cycles to the first keyframe of the sequence, and the rightmost button fast-forwards.
After a hero icon is placed or a draw tool is used, a keyframe is automatically placed in the timeline. Click the timeline to set another keyframe, then move the selected hero to the next position (or change the drawing) in order to set that position at the keyframe. If a hero icon moves over multiple keyframes, an editable path is shown when the icon is selected. Health, ultimates showing/hiding, and skills showing/hiding can be changed over the timeline.
To delete a hero icon from the timeline, press "Delete" on the keyboard or in the menu under the "Edit" option. This gives you the option to delete the icon from the current keyframe, or clear from all keyframes. To hide an icon at the end of a sequence, keeping the rest of it on the timeline, use the hotkey "E".
Collaborative Sessions
To begin a multi-user session, as a host of the session, click "Start Session," select the map name, and set a password. This password will be used by non-hosts to join a multi-user session. Anyone with the username of the host and the password that the host designates will be able to join the session.
A list of viewers' usernames can be seen under the "Window" option in the menu. The host can kick viewers from this list, which will kick the viewers from the session.